Capturing the Moment
A beginner’s guide to taking better pictures at your schools
This article is even better when paired with the companion discussion guide.
When you think about the miles Ansel Adams hiked to take his famous landscape photos, it makes sense that he once said, “You don’t take a photograph; you make it.” He knew from experience that it takes effort and planning, not just luck, to get the perfect image.
Although you’re not trying to capture the grandeur of Yosemite, photography has become a necessary component of any school marketing effort. And while we love to see districts share their stories, the pictures they post don’t always promote their schools as intended.
It sounds obvious, but if you want your photos to make your district look good, the pictures you share have to (literally) put your subjects in the best light possible. Even if they come from a well-meaning teacher sharing what they’re doing in the classroom, photos that are blurry, uninteresting, or poorly lit reflect badly on you.
Of course, not every district can hire a dedicated photographer. But these days, everyone is walking around with a world-class camera in their smartphone, making it easier than ever to take and share photos. A good camera doesn’t necessarily guarantee good pictures, but, with a little bit of know-how, anyone can go from a photography novice to an amazing photojournalist for their district.
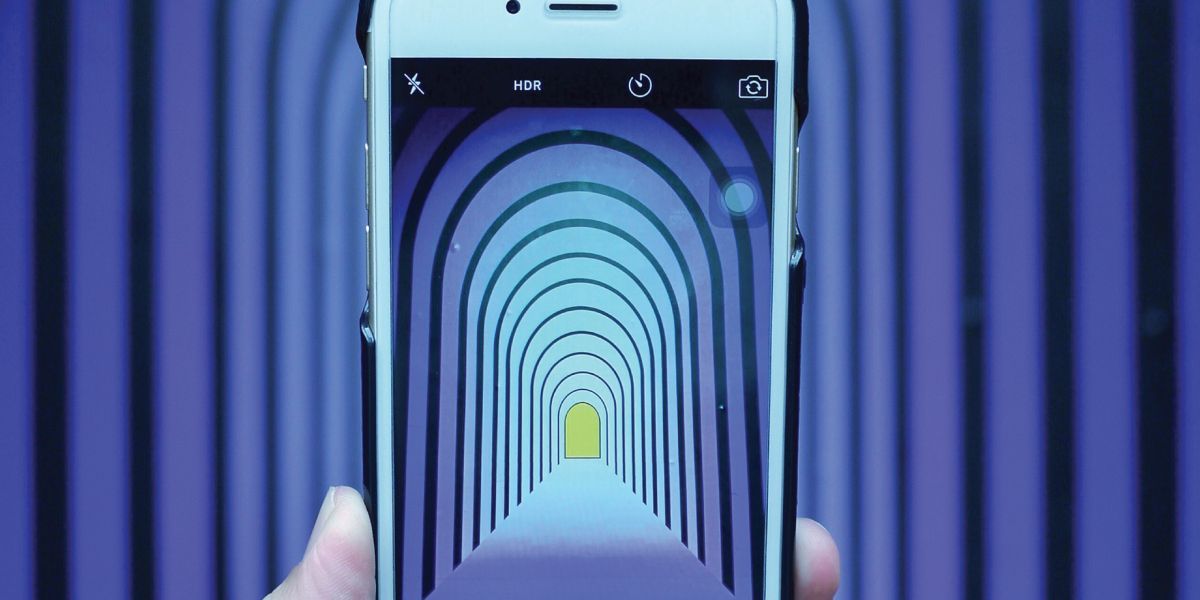
Take care of your phone.
Before you even start to worry about taking great photos, make sure you set your phone up for success. We use our smartphones for everything, which means you’re constantly touching your phone’s camera lens, depositing dirt and oil all over it.
The most overlooked step toward taking great smartphone photos is cleaning your phone’s camera lens before you take a picture. Your camera “sees” through that lens, so anything on it will show up in your shot. Even Ansel Adams’ photos wouldn’t look good if there were fingerprints on his lens.
You’ll also want to make sure to use the correct camera lens. You will typically want to stick with your phone’s default—both iPhone and Samsung call this the “Wide” lens.
Some newer models have multiple lenses that can be used for specialty shots, like telephoto lenses for photographing subjects far away. However, no matter the model of your phone, you will want to avoid the front-facing “selfie” camera. This camera is always a lower quality than the standard “Wide” lens, and you should only use it if you’re actually taking a selfie.
And while we’re talking about equipment, let’s make one note about smartphones in general. While the newest models will always have the best cameras, we’re now at a point where the difference in camera quality from year to year isn’t noticeable for most users. Just make sure that your phone isn’t a dinosaur; models made in the past three to four years will give you the best results.
Consider composition.
While your equipment is important, your camera is ultimately a tool. A great camera definitely makes it easier to take great pictures, but the quality of a photo ultimately comes down to the person behind the lens.
What separates a great photo from a bad one is its composition: the story that the picture is telling. It’s not about the content of the photo; it’s how that content is arranged.
A photo’s composition is determined by how the different elements are positioned in the picture and the way our eyes move between those elements. When the composition is good, all the visual elements of a photo—lighting, spacing, subject placement in the picture—work together to tell a clear story.
Even if you know nothing about composition, you’ve probably looked for it before. If you’ve ever checked a picture immediately after taking it to see if it’s “good,” you were checking its composition.
One of the best ways to train yourself in composition is to see it firsthand. John David Pittman, an award-winning photographer whose pictures have appeared in Fortune, The Wall Street Journal, and Smithsonian magazine, argues that to take good photos, you have to study good photos.
“If you don’t know what good photography looks like,” Pittman says, “then you won’t be able to create something that looks good. But once you start to analyze something, you can figure it out. You can mimic it. Look at good photography, and know what it looks like—so you have an idea of what is good and what is not.”
Take the two images below, for example. While both have the same subject, the bottom one looks and feels better. Sometimes, you can point to specific reasons one photo looks better than another, but often you can’t. The composition is what makes those images feel so distinct despite being so similar.

Focusing on composition enables you to move from simply documenting what’s happening to telling a story with each photo. “You have to create your images with intent,” Pittman says. “Before you get started, ask yourself: Why are we taking pictures of this? What story are we going to tell with these images? What impact do we want these photos to have?
Ultimately, your mindset is the biggest factor in taking better photographs. If you’re thinking about composition when you take a photo instead of just snapping the first thing you see, your photos are going to be better. So before you take a picture, ask yourself: What story am I trying to tell?
Use the Rule of Thirds... sometimes.
Because composition is about creating a story, there are no hard-and-fast rules to follow, but a very helpful starting point is the Rule of Thirds. Despite the name, the Rule of Thirds is more like a helpful suggestion, one of many techniques you can use to compose a quality photograph.
To use the Rule of Thirds, start by dividing an image into thirds both horizontally and vertically. As you can see from the example below, the grid lines create four intersections. When you look at a photograph, your eyes tend to gravitate toward these four points.
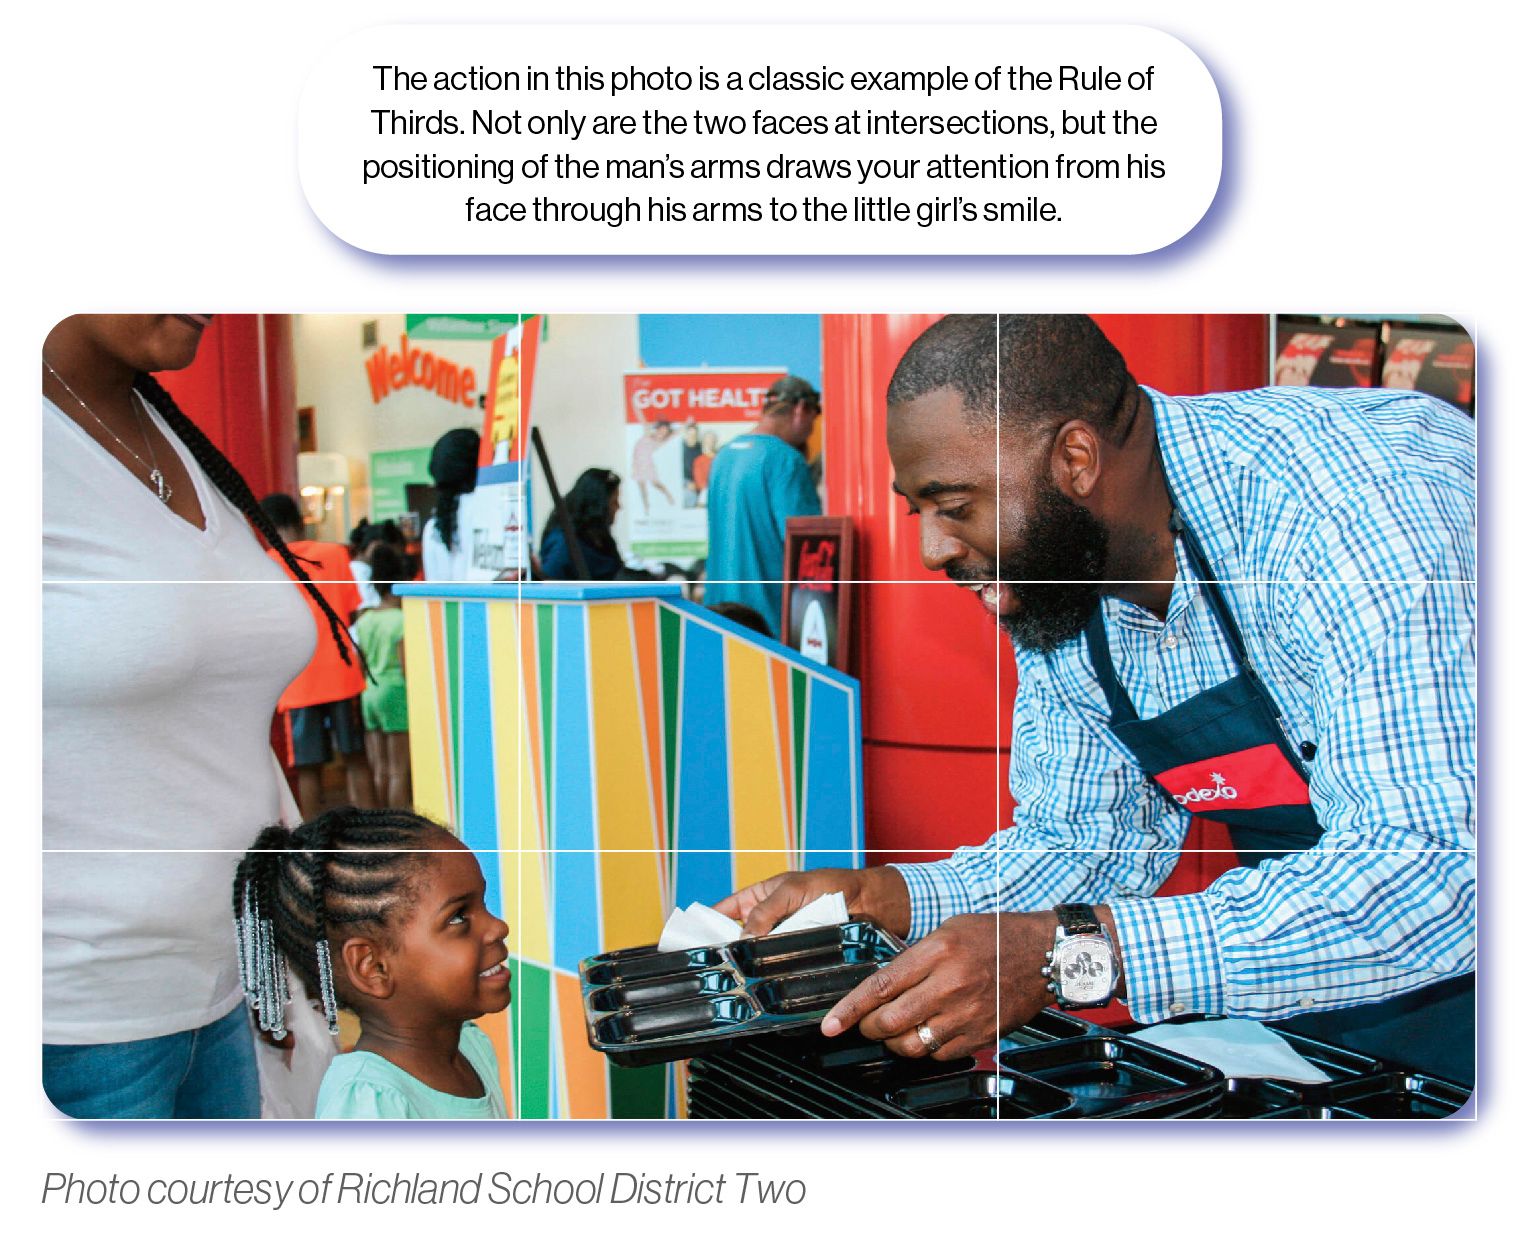
Ideally, the points of interest in your photo should fall along one of these lines, with the most interesting aspects at the intersections. In the example above, the two subjects’ heads are placed on the top right and bottom left intersections, while the action with the tray falls along the bottom third line.
Your phone manufacturer has even provided a useful tool to help you follow the Rule of Thirds. In your camera settings on your Apple or Android phone, you can find the option to add “Grid Lines.” This setting will display a grid on your screen to guide you whenever you take a picture.
While this tip may be called a “rule,” you don’t always have to follow it. Many great photographs use other techniques or shirk the standard “rules” entirely. But we’re focusing on it here because it’s a very easy starting point toward taking well-composed shots with confidence.
Look at the lighting.
Lighting is the most important factor in creating great photos; that’s why professionals bring along portable lighting to photo shoots. The source and direction of the light determine what will be illuminated in an image and where shadows will fall. If your subjects have shadows covering their faces, no amount of editing will improve their appearance.
The problem for schools is that lighting often feels out of your control. Inside, schools have lots of bright fluorescent lights that create a glowy appearance in photos. Outside, you’re at the mercy of the sun. But while you can’t constantly carry around portable lighting, you do have some control over the way you light your photographs.
“We see backlit photos all the time—people standing together for a group shot, but they’re standing with a window at their backs,” Pittman says. “That’s not going to help anybody.” Instead, put your subjects next to a window so the natural light hits their faces and not their backs. “It’s about knowing where your light source is and maybe turning people around,” he adds. “You go from having a terrible-looking photo to a nice, brightly lit photo.”
To find the best lighting direction for a photo, take a leaf out of your students’ book. Using your front-facing camera, hold your phone at arm’s length facing you. You should be able to see your face on the screen. Now, rotate your entire body. As you move, you’ll see the lighting on your face change. Once you find the angle with the best light, you can position your subjects there. Just remember, don’t actually use the selfie camera for a picture unless you are taking a selfie.
When it comes to that unflattering fluorescent lighting in a school building, “as long as it’s even, it’s fine,” Pittman says. “It might be an ugly temperature balance, but as long as it’s even light, you’re okay. Just don’t backlight people.”
Take multiple shots.
If you’ve ever hired a professional photographer, you might have noticed that they always take way more pictures than seems necessary. You’ll often see them snap four to six versions of what looks like the same thing.
Professionals know that despite their years of training and experience, their first picture won’t be perfect. Even if you have the best eye for composition, you’re likely going to miss things, from a stray shoulder in the frame to a flagpole that looks like it’s jutting out of someone’s head. Instead of hoping for the best, professionals take as many pictures as possible to ensure at least one shot will be perfect.
While it may look like a photographer is taking the same photo over and over, they’re actually making small adjustments on each shot to create as many slight variations of the same picture as they can. This usually includes moving around to get a different angle or taking the shot from a higher or lower perspective.
When the photographer looks at the shots afterward, they get to pick the one with the best composition. The first shot you take will often have the most obvious composition—which may not be the most interesting. That’s why one of those extra shots usually turns out to be the best.
So think like a professional and take several pictures of the same subject. Try different angles and compositions. You’ll get a bunch of pictures that you won’t use, but you’ll likely end up with a better shot than you ever could have planned.
Default to horizontal.
Think about a disposable camera. The design—from the way the camera fits in your hands to the branding—leads you to take a horizontal picture. But with the rise of selfies, Snapchat, and TikTok, vertical video and images are becoming much more common.
Generally speaking, you should default to horizontal. This orientation tends to include more scenery, leading to more visually interesting pictures. Additionally, most website hosting and public social media platforms require pictures to have certain pixel ratios and will resize images that do not match. Those ratios, which vary by platform, are more likely to be met if your image is horizontal, preventing Twitter or Facebook from unintentionally cutting off someone’s head.
That said, vertical pictures can be amazing if they serve your story. While horizontal photographs typically offer more context, vertical ones help accentuate your subject’s stature. For example, if someone is giving a speech, a vertical photo can make the subject appear grander and more authoritative. If you’re unsure which orientation to use, just try both.

Move in, don’t zoom in.
Your phone’s camera may be as good as professional cameras in many respects, but even the best smartphone camera has its limitations. Professional-grade cameras use optical zoom, which allows you to zoom in without losing any picture quality. Unfortunately, your phone—and digital cameras in general—use digital zoom, which simply magnifies an image like you would on a computer. This creates graininess and lowers the quality of your picture.
Instead of using your zoom, simply move closer physically to your subject. This allows you to “zoom in” as much as you want without affecting the quality of the image. Ideally, you should take multiple photos from multiple distances in order to vary the composition.
Pittman adds that moving in closer can even help with the composition of your photo. “Get way closer than you think,” Pittman says. “Fill your frame. A photo of an in-service day from the back of the room is terrible. But get close to somebody in the meeting and get their reaction to something that’s said, or get in on details—hands taking notes, a close-up shot of the person speaking. Closer is better.”
Physically moving closer might not always be realistic, like at a football game. If you are trying to photograph events that require zoom, you should consider investing in a camera with a telescopic lens or hiring a professional photographer.
Handle it in post.
While cameras have become more common and powerful, the real revolution has occurred in image manipulation. Previously, it took an expert in a darkroom to do even the simplest editing, like cropping photos. Now, you can do more on your phone and in social media apps than you could have ever dreamed of in a darkroom.
We won’t go into too much detail on editing, but suffice it to say that editing can help save a photo that’s not quite perfect. The most common technique is cropping, or removing some of the outer area of an image. With a small amount of cropping, you can adjust your photo so it follows the Rule of Thirds or cut out that stray arm that snuck into the side of your picture. Just a little editing can help you focus on the most important and interesting aspects of a photo.
But be careful. While editing can be great, less is often more. And remember, composition is about telling a story with an image. While it’s fine to edit a photo to make it more visually appealing, it’s unethical to edit an image in a way that changes its meaning.
Avoid the cliche.
We’ve said it over and over again: your picture tells a story. But if you’ve looked at school social media posts, you’ve likely seen the same overused images: headshots, students holding awards, or group shots of people posing for the camera.
We get why this happens. It can be hard to remember to take pictures in the moment, especially for a teacher juggling 40 different tasks at a time. In fact, these shots have become so ubiquitous with schools that it may feel like you have to share them. But if all of your pictures are the same as every other district’s, you’re not telling your unique story.
To Pittman, it’s about remembering the process and not focusing on the end result. “People want to see the process—how things happen, how it was done—rather than just a photo of a nice trophy,” he says. “Think about everything as a documentary film. All the in-between stuff is the good stuff.” For example, if you want to celebrate the quiz bowl team’s victory, don’t just show them on the awards stage. It’s the in-between shots that tell their story: a student studying before a match, someone buzzing in, kids celebrating on the bus after a victory. “If you show what people went through to win a quiz bowl trophy, then it’s a story,” says Pittman.
When you must use a headshot or cliche picture, pair it with something more interesting. For example, when introducing a new principal on social media, you might share a photo of them interacting with a child alongside their portrait.
Although you may not always be able to avoid it, keeping composition in mind will help you sidestep overused school photographs. If you know what you’re trying to say every time you look through the lens, you’re more likely to get a picture that actually says it. Only you know your story; now, you just have to pick up your phone and start telling it.
![]()
SchoolCEO is free for K-12 school leaders. Subscribe below to stay connected with us!